top of page

FOR MORE INFORMATION CALL:
314--349-2257
Livengood Contracting Projects
FOR MORE INFORMATION CLICK ON THE PICTURES
Dartboards
Livengood Contracting build by specified plans dartboards for a customer's company. The Dartboards are designed and sold by Snyper Games and built by Livengood Contracting.
 Dartboard Parts |  Dartboard Parts | 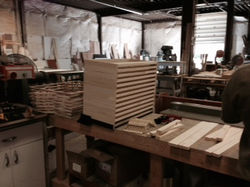 Dartboard pieces coming together |
|---|---|---|
 Precise cuts and assembly |  Dartboard assembly |  Finishing the backs of the dartboard |
 Making a frame |  Frame assembly |  Placing the frames |
 Dartboards prepared for stain |  Fixing the backs for mounting piece |  Stained light holders |
 Staining |  Staining |  Dart Holders |
 Several Colors of Stain |  Black Stain |  Completing the Staining Process |
 Finishing Touches - Dartboards Ready |  Stained Light Holders | 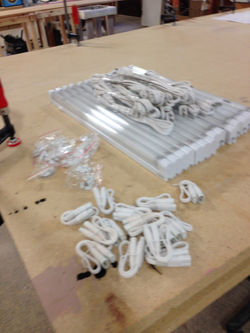 Light Fixture |
 Attaching the Lights |  Attaching the Lights |  Dartboard designThe carpet and bullseye is missing, although an excellent example of the finished product. |
2015
GROWING INTO THE NEW YEAR
BROWN SHOE LOBBY RENOVATIONI
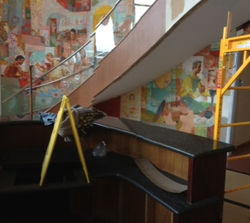
 The iconic Brown Shoe Company |  The original veneer |  The Staircase |
|---|---|---|
 Brown Shoe Staircase | 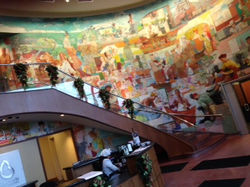 Brown Shoe Staircase |  Making the initial marks.Initially the measurements are taped off so that the form (wall) can be fabricated on site. |
 Taping the lineThe measurements are carefully transferred to the floor. |  CautionAll of the work is completed in the front lobby. |  The blue lineThe line extends from one side to the other to get the precise shape of the wall. |
 Base being set |  Blue line marks |  The form is fabricated on site |
 Setting up the form |  The formThe form is set up in the lobby. Once completed it will be dismantled, taken to the shop, and reassembled. |  The form |
 The Form | 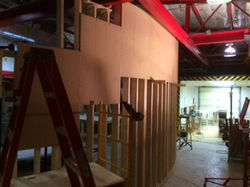 The form going up in the shop |  Form reassembled in the shop |
 The formOnce the form is set and stable then the area for the veneer will be marked in black. |  The Form in the shop |  Precise markingsThe darkened area is where the flexboard will be formed. It serves as the template. |
 The initial layout | 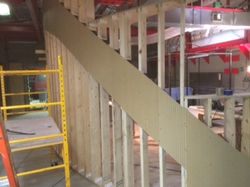 The initial cut layout |  Clamped in place |
 Hoisting the Flexboard |  Addition of metal stripThe metal strip and additional blocking was added with the discovery of drywall underneath the existing veneer in the lobby. New means and methods had to be developed to provide stability for the materials. |  Bending the metalWorking at the limits of the materials.Without a textbook means to build the template, each new twist in the development was a learning point. Artwork. |
 Metal strip | 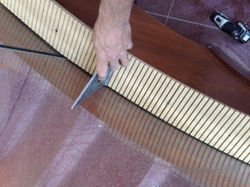 Going up the staircase | 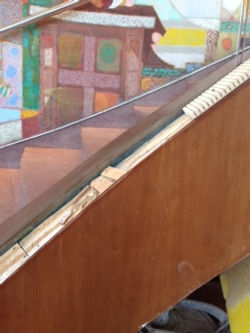 Flexboard set up the staircase |
 Original Veneer removed |  Preparation for the panels |  All original veneer removed |
 Form set up the staircaseThe flexboard was cut along the curve and placed in preparation for the panels. |  The original desk |  The original desk |
 Top view of desk |  Forms developed for desk |  FormsAll templates were cut on site. |
 Form was notched for the metal inlay |  Veneer going on desk |  VeneerEach panel is cut on site to properly fit. |
 Veneer on desk |  Veneer on desk |  Gate entrance to desk |
 Gate entrance with veneer |  Desk with Veneer |
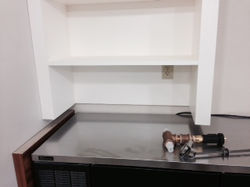
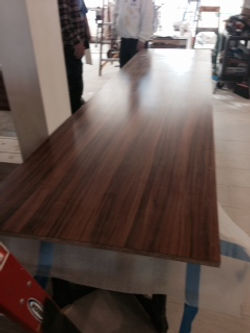
SONESTA
 100.JPG | 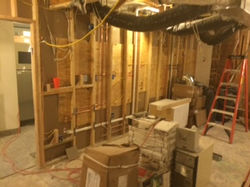 Starting the Project |  99.JPG |
|---|---|---|
 97.JPG |  91.JPG |  93.JPG |
 94.JPG |  96.JPG |  88.JPG |
 92.JPG |  1.jpg |  27.jpg |
 13.jpg |  48.JPG |  80.JPG |
 15.jpg |  4.jpg |  16.jpg |
 83.JPG |  49.JPG |  95.JPG |
 84.JPG |  52.JPG |  58.JPG |
 38.jpg |  39.jpg |  40.jpg |
 5.jpg |  67.JPG |  7.jpg |
 6.jpg | 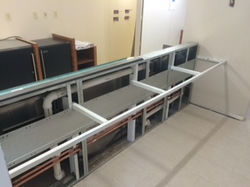 90.JPG |  31.jpg |
 12.jpg |  11.jpg |  29.jpg |
 8.jpg |  2.jpg | 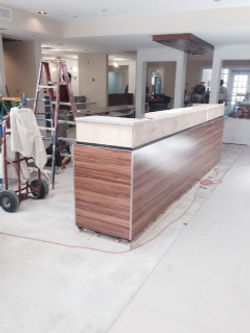 20.jpg |
 34.jpg |  33.jpg |  85.JPG |
 81.JPG |  82.JPG | 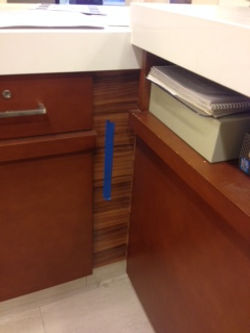 64.JPG |
 65.JPG |  63.JPG |  87.JPG |
 89.JPG |  68.JPG |  56.JPG |
 57.JPG |  69.JPG |  70.JPG |
 3.jpg |  43.jpg |  50.JPG |
 51.JPG |  42.jpg | 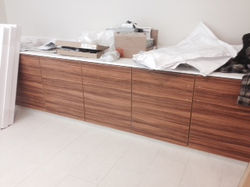 36.jpg |
 61.JPG |  71.JPG | 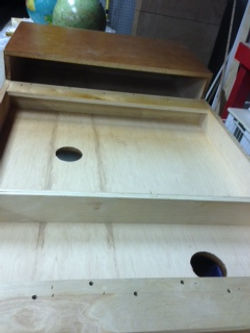 73.JPG |
 72.JPG |  74.JPG |  78.JPG |
 79.JPG | 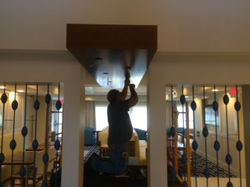 77.JPG |  76.JPG |
SPECIALTY CRATES
 Chandelier to crate |  ChandelierThe chandelier is carefully wrapped with packing material. |  Wrapping the Chandelier |
|---|---|---|
 Wrapping the Chandelier |  Totally wrapped |  Chandelier carefully placed in crate |
 IMG_5210.JPG |  Suspended by interior bar |  Chandelier Crated |
 Chandelier Crate |  Crates designed for specialty itemsLarge crates designed to safely store and move all types of specialty items. |  How to move a 700 pound table baseHow do you move a 700 pound table base? Take notes from the people who build the pyramids. You roll it! |
 700 pounds on large dowelsRolling the table base to the door to place in crate. | 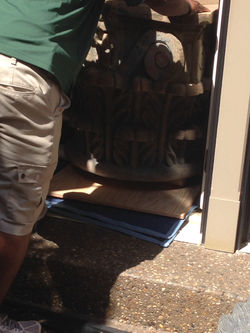 Into the crateTable base safely moved and placed in the crate for moving and storage. |  Large artwork or mirrorCrates designed to fit each item for safe transport or storage. |
 Crate for large mirrorCrates designed specifically for the item. |  Large Round MirrorCrate packed and item protected from harsh movements. |  Large CratesAll crates are specifically marked for the movers and or storage company to understand the contents of the crate. |
 Packing and PreparationChandeliers have very intricate pieces that are individually wrapped with packing material. |  Packing a ChandelierThe glass pieces are protected so that they don't jiggle around and break. |  Packing a Chandelier |
 Packing a Chandelier |  Packing a Chandelier |
SPECIALTY ITEMS
 Large Floor Mirror MountedThe customer wanted a 400 pound floor mirror mounted on the wall. | 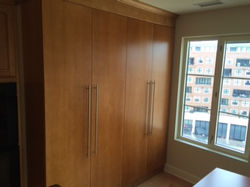 Beautiful cabinet designed and built | 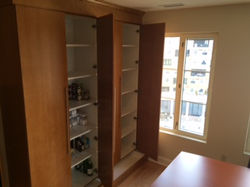 Cabinet designed and built |
|---|

LIVENGOOD CONTRACTING LLC
COMMERCIAL AND RESIDENTIAL CONTRACTING
INTEGRITY IS NON-NEGOTIABLE
bottom of page